Using the BioLector XT Microbioreactor Gassing Lid
Introduction
The BioLector XT microbioreactor is a bench-top device for high-throughput screening of microbial cultivations in combination with online-monitoring of common cultivation parameters such as biomass, pH, dissolved oxygen (DO) and fluorescence of various fluorescing molecules or proteins in the cultivation medium.
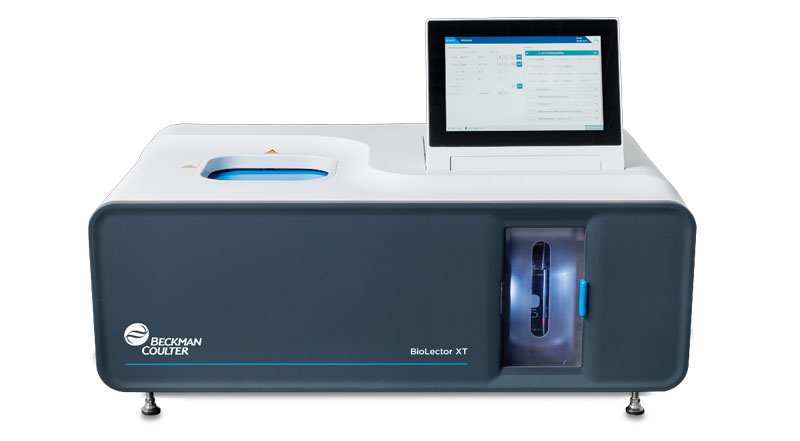
Figure 1. The BioLector XT Microbioreactor for microbial high-throughput cultivations.
The large amount of bioprocess data generated allows accurate and reliable bioprocess development, strain characterization, media optimization and clone screening in the shortest possible time. High throughput cultivations are carried out in SBS/SLAS standard format microtiter plates (MTPs) with 32 or 48 cultivation wells each, allowing up to 48 simultaneous experiments in one microbioreactor run. The gassing lid provides direct gassing of the MTP during a cultivation experiment.
In combination with the RoboLector liquid handling system, the RoboLector XT Automated Microbioreactor,provides a unique automated cultivation platform, integrating the high-throughput cultivation and online monitoring capability with precise and accurate liquid handling of a robotic system. Automated cultivations allow complex experiments: This platform autonomously prepares media compositions, e.g. from design of experiments (DoE) templates. In combination of the microfluidic system of the microfluidic MTPs various feeding and sampling options are available. For example, cultivation inducers and additional feed solutions can be added or pH value adjusted. Each process is triggered and monitored for each well individually, either according to a predefined schedule or by online process signals. Automated sampling into various targets, including e.g. a cooling station, facilitates optimal process monitoring and control.
In this Technote we describe how to use the gassing lid, the different gassing options and all gassing lid variants configurable to your biological applications in the BioLector XT Microbioreactor and in the RoboLector XT Automated Microbioreactor.
Application of different gassing modes
Before the preparations of a physical cultivation setup, create a protocol in the BioLection software as described in the BioLector XT Microbioreactor user manual. Via the BioLection software you can choose between five different gassing modes. Depending on the biological application, a defined gassing option is essential for successful cultivation experiments, e.g., to realize a certain cultivation condition like dissolved oxygen in the cultivation medium. As shown in figure 2, you can easily choose between atmospheric air, N2 for the anaerobic mode and O2 down-regulation, CO2 for the CO2 up-regulation or O2for the O2 up-regulation.
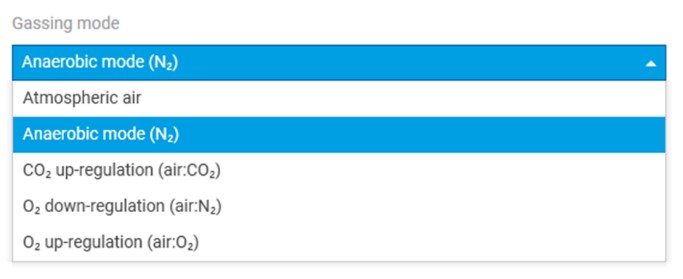
Figure 2. The protocol settings of the BioLection software provide five different gassing modes.
Constant or variable flowrates between 5 50 mL/min can also be selected, as presented in figure 3.
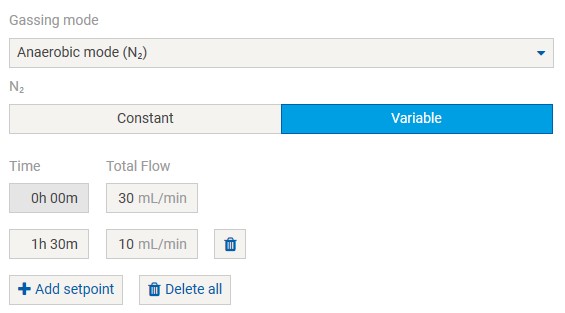
Figure 3. Via the BioLection software constant or variable flow rates between 5 and 50 mL/min are selectable in the protocol settings menu.
Choosing the appropriate gassing lid variant
After all relevant experiment conditions are set up in the BioLection software and you are ready to begin, prepare the MTP as follows:
- Start the preparations in a sterile environment by pipetting culture media, fermentation broth or any liquid into the cultivation wells required in your experimental setup.
- Add pH adjusting agents or feed solutions in the MTP reservoir wells in rows A and B.
- Attach the MTP silicon foil via the Foil Applicator XT as described in the BioLector XT Microbioreactor manual.
Besides the gassing options, there are four variants of the gassing lid to choose from depending on the biological application:
- E BD48 for standard, non-microfluidic experiments in the BioLector XT Microbioreactor (figure 4).
- E-BDR48 for non-microfluidic experiments in the RoboLector XT instrument (figure 5).
- E-BD32 for standard microfluidic experiments in the BioLector XT Microbioreactor (figure 6).
- E-BDR32 for microfluidic experiments in the RoboLector XT Microbioreactor (figure 7).
Be aware that all materials corresponding to the gassing lid are oxygen-compliant, meaning it is mandatory to wear gloves while handling those parts to avoid contaminations.
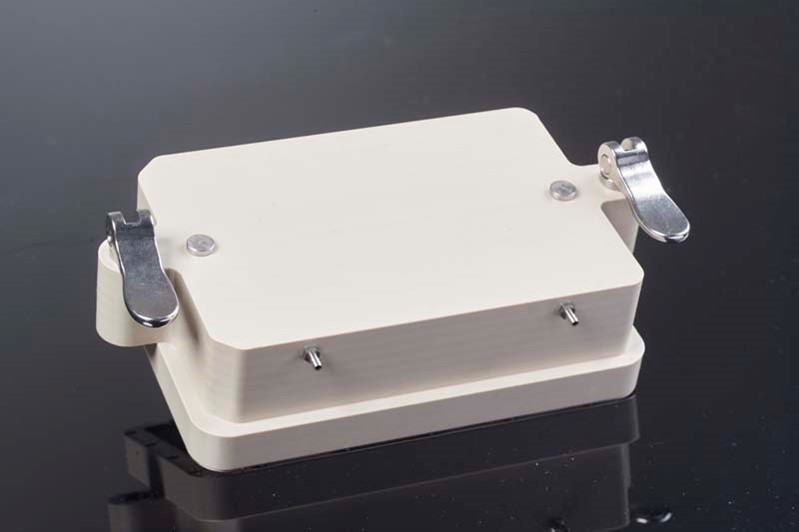
Figure 4. Gassing lid variant EBD48 for standard batch cultivations in the BioLector XT Microbioreactor.
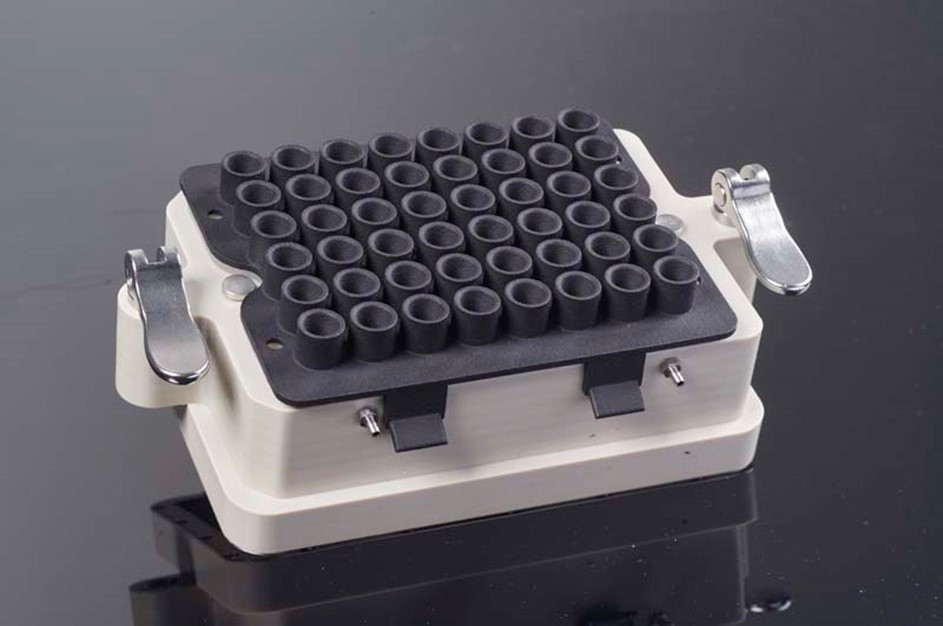
Figure 5. Gassing lid variant E-BDR48 for non-microfluidic experiments in the RoboLector XT XT Automated Microbioreactor.
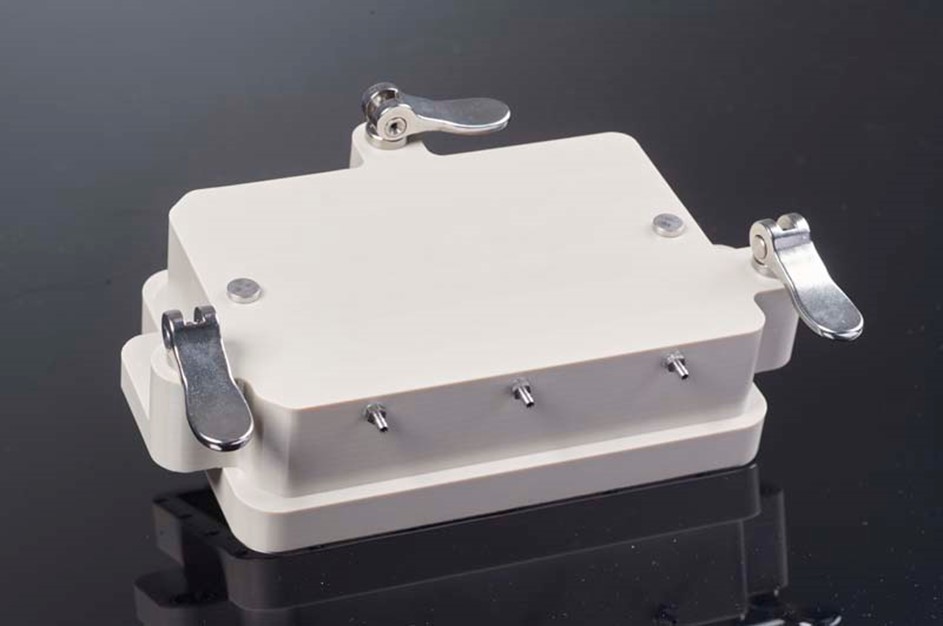
Figure 6. Gassing lid variant E-BD32 for standard microfluidic experiments in the BioLector XT Microbioreactor.
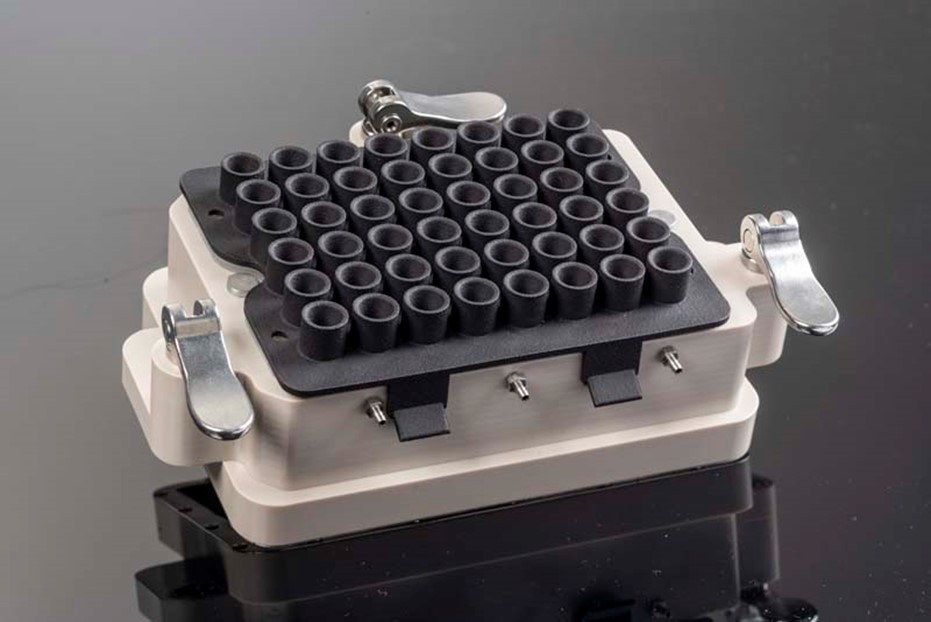
Figure 7. Gassing lid variant E-BDR32 for microfluidic experiments in the RoboLector XT XT Automated Microbioreactor.
After the MTP is prepared the gassing lid can be attached to the MTP.
- Put the gassing lid on the MTP and ensure that the beveled corners of both the MTP and the gassing lid are located on the same side, e.g., left-hand side.
- Push down the gassing lid to fix the MTP to the gassing lid. The two metal pins located on the top of the lid on the left and right-side step outwards when adjusted properly.
Note: For RoboLector XT Automated Microbioreactor experiments, place a second silicone foil F-RSXT onto the gassing lid. The pins mentioned above will ensure a correct orientation for the application (see figure 8). Thus, the use of the foil applicator is not required.
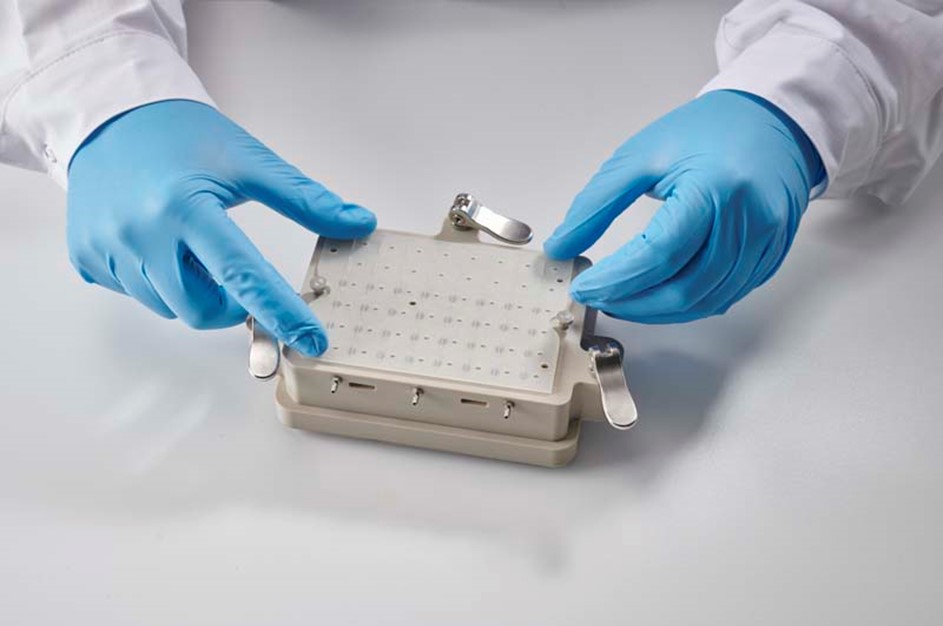
Figure 8. Preparation of the gassing lid E-BDR32 microfluidic experiments in the RoboLector XT instrument.
Clip the robotic lid on (E-BDRL) the gassing lid as shown in figure 9.
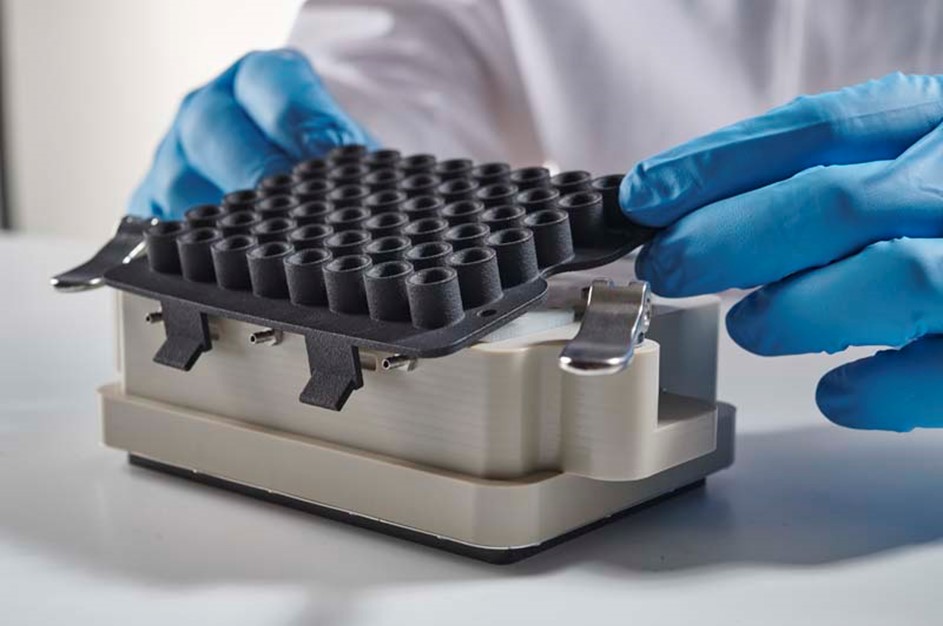
Figure 9. Gassing lid variant E-BDR32 for microfluidic experiments in the RoboLector XT XT Automated Microbioreactor.Attachment of the robotic lid to the gassing lid E-BDR32.
Place the gassing lid into the BioLector XT Microbioreactor incubation chamber
- Take the prepared gassing lid out of the sterile or, if applicable, anaerobic environment. Do not tilt or shake the MTP to prevent a wetting of the MTP foil from the inside.
- Check that all gassing tubes are attached to the gassing lid. If necessary, attach all gassing tubes to the gassing lid before placing it into the incubation chamber.
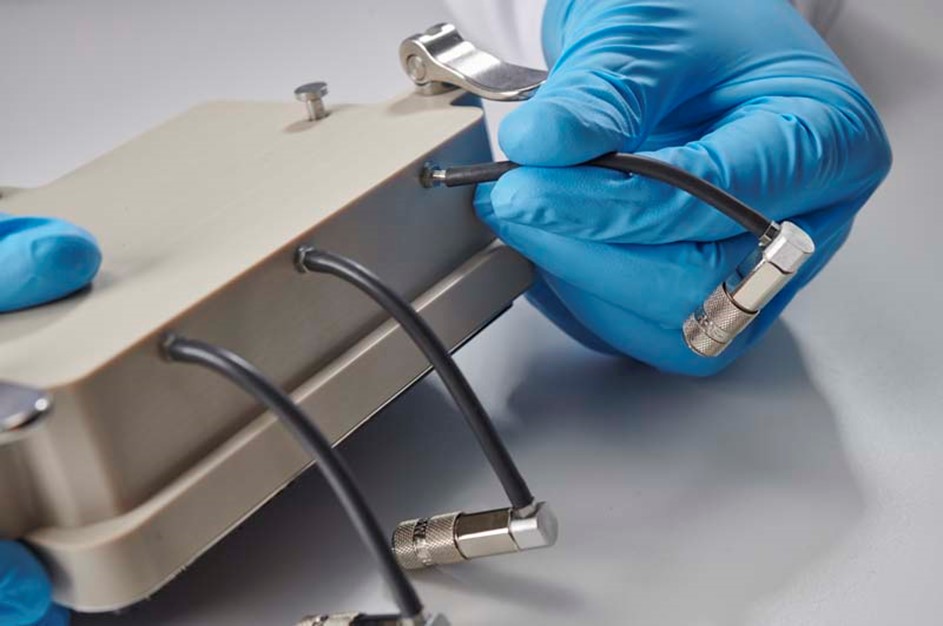
Figure 10. Attachment of the tubing to the gassing lid.
3. Confirm position of the adapter plate in the microbioreactor incubation chamber is placed in the 48 mode (figure 11) or 32 mode (figure 12) position.
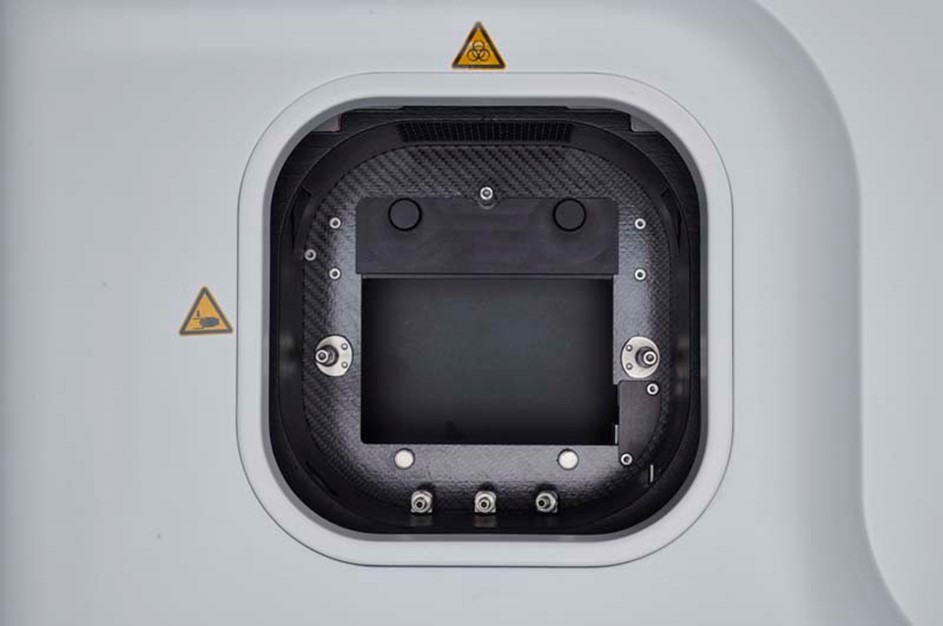
Figure 11. Position of the adapter plate in the 48-mode position.
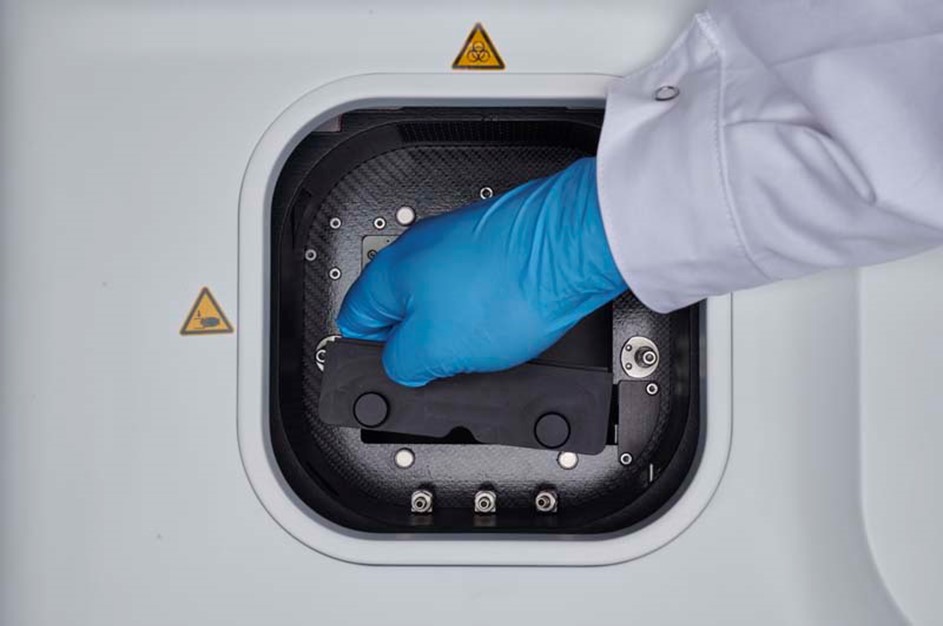
Figure 12. Placing the adapter plate into the 32-mode position.
4. Place the gassing lid into the incubation chamber as shown in figure 12 and push all the levers down to fixate it (see figure 14).
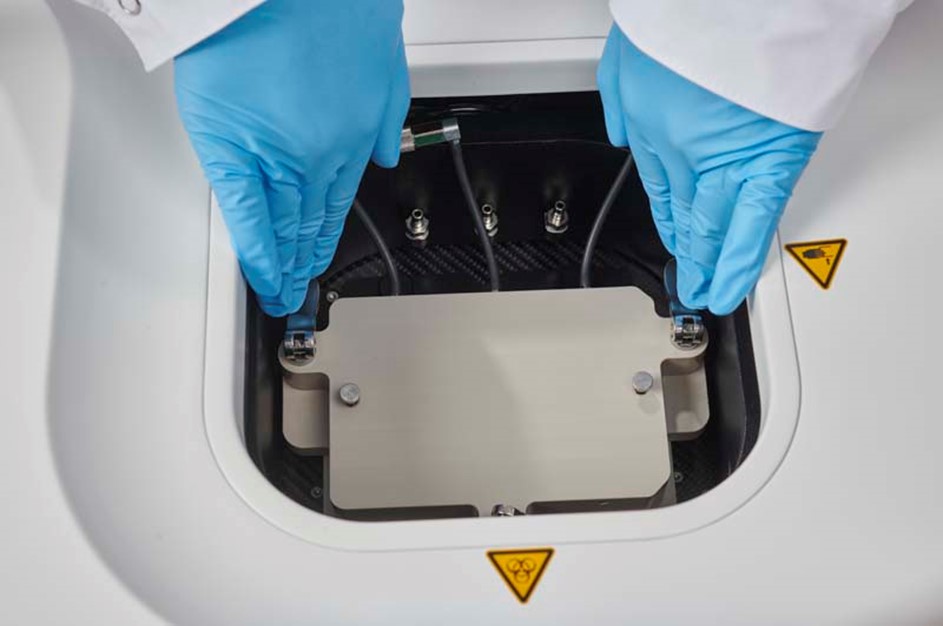
Figure 13. Placing the gassing lid into the incubation chamber.
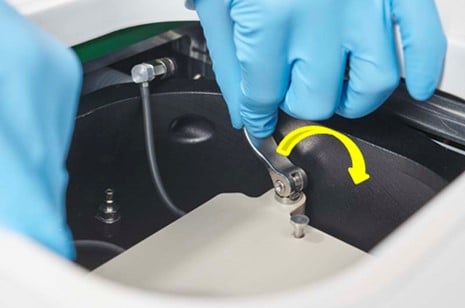
Figure 14. Push down the metal levers to fixate the gassing lid.
5. Attach the tubing of the gassing lid to the push-in connectors on the shaking table at the front side of the microbioreactor incubation chamber. Now, the cultivation experiment can start.
Removing the gassing lid from the incubation chamber
After the cultivation experiment is stopped, deactivate the MF-pressure and stop the gas supply. Then pull the quick connect fittings from the gassing lid (figure 15) and all metal levers to remove the gassing lid and MTP out of the incubation chamber. By pushing down the metal pins on the top of the gassing lid, the MTP can be released from the gassing lid as well.
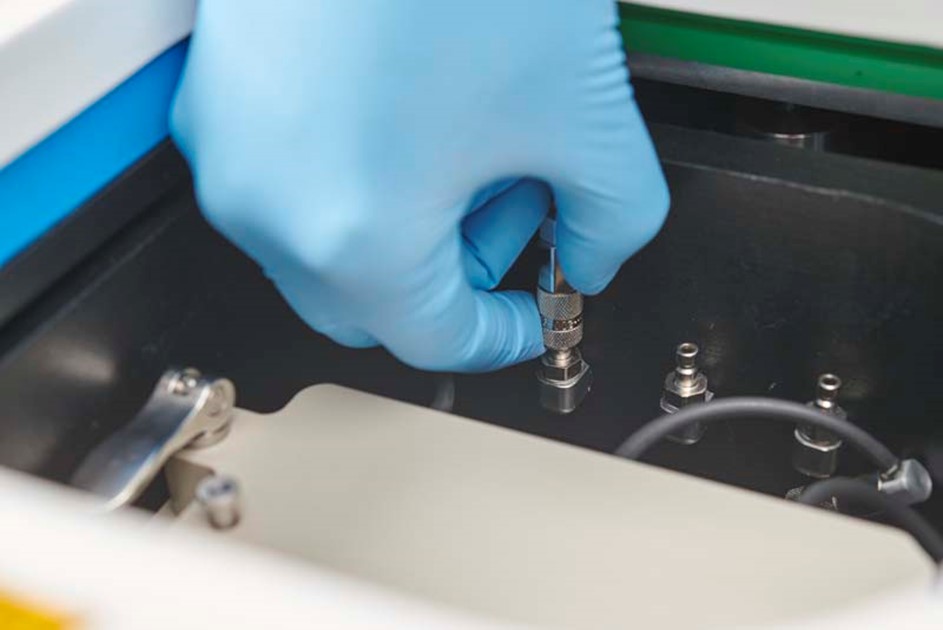
Figure 15. Removing the gassing lid out of the incubation chamber.
Cleaning the gassing lid
When disinfecting the gassing lid, let the disinfectant evaporate while standing in a sterile hood.
Note: Exposing the gassing lid to pure oxygen may cause oxidizing. Do not lubricate the X-Y axes. Do not use liquid fat-dissolving agents. Only use a lint-free microfiber cloth and make sure that no cleaning solution drips off the tissue.
Important: When using the microfluidics module concentrated acids and alkalis could settle in the gassing lid.
Additional BioLector XT Content

