CellMek SPS System: Panel Designer Software
Jessica Ashbaugh, Beckman Coulter, Miami, USA
William Gutierrez, Beckman Coulter, Miami, USA
Carsten Lange, Beckman Coulter, Krefeld, Germany
The CellMek SPS Sample Preparation System automates a workflow—from sample loading to samples ready to analyze—without user intervention. These sample preparation workflows are fully customizable to fit specific lab needs and are created using the CellMek Panel Designer Software.
This page describes how to build panels used by the CellMek SPS instrument for customized workflows. Features highlighted include the integrated Beckman Coulter reagent catalog, as well as custom defined reagents, specimen volume selection based on specimen WBC concentration, and options in specimen/sample washing steps.
-
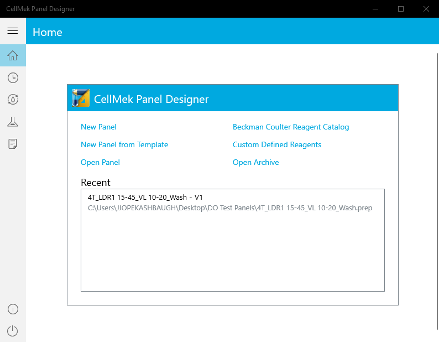
Open the CellMek SPS Panel Designer software. The left pane displays icons for Home, Recent, Panel, Reagent, and Archive. Alternatively, these can be accessed through links from the Home Screen.
-
Selecting the Reagent icon displays options for the Beckman Coulter Reagent Catalog and Custom Defined Reagents.
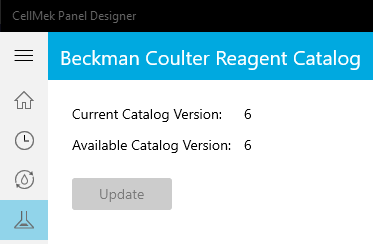
Select Beckman Coulter Reagent Catalog to confirm that the latest Catalog version has been loaded; select Update if needed.
Select Custom Defined Reagents to create the desired custom labels for Liquid and Dry Antibody, Stain, Lyse and Prep Reagents. Select Add Reagent under the appropriate section to define the Reagent Name and add any comments. An example for 1x IOTest Lyse is shown below.
-
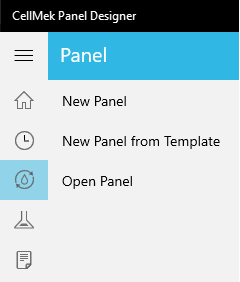
From Panels, select New Panel to generate a new test panel to be run on the CellMek SPS instrument. If there are existing panels available in a file path directory, here you can also use the New Panel from Template selection to generate new test panels, or the Open Panel selection to view and edit new versions via the Save As function.
-
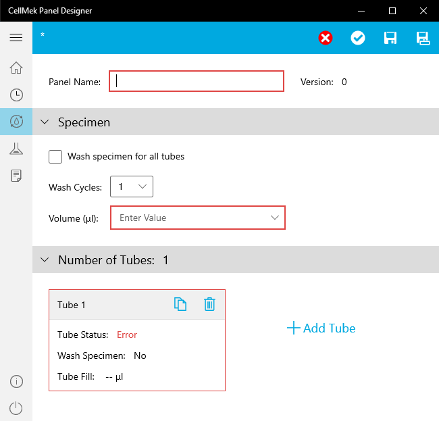
Selecting New Panel opens the following window. Boxes highlighted in red are required; minimally the Panel Name, Specimen Volume (µL) and a single tube is required.
Note: Hovering over red boxes generates a popup message displaying acceptable parameters pertaining to the given field.
-
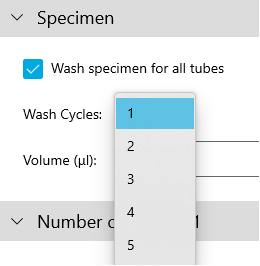
Check the Wash specimen for all tubes box if a specimen wash is desired across all tubes in the panel, and denote the number of wash cycles desired (1-5) to be performed by the CellMek SPS system. Note: Cycle speed and time are preset in the system. The number of wash cycles needed should be validated per application. Fewer washes will increase overall throughput.
-
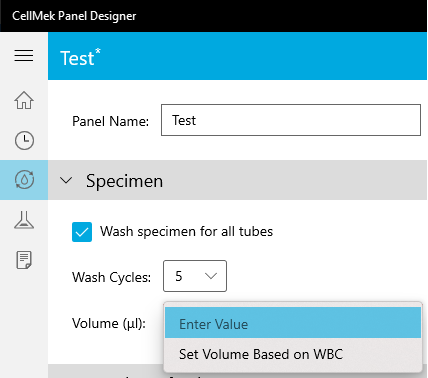
Next, select the Specimen Volume. This can be a set volume in the range of 25-400 µL, or defined based on WBC concentration information. The WBC concentration can be provided to the CellMek SPS instrument via LIS, or manually entered by the user on the system’s Load Specimen screen at the time of panel assignment.
If Set Volume Based on WBC is used, the user can establish rules to define specimen volumes to use for different WBC concentration ranges, including the option not to process the sample in case concentrations are too high or too low. There is also an option to dilute the specimen to a specified volume if alignment across reaction volumes is required. In the example shown below, a specimen containing 35,000 Cells/µL would be dispensed at 25 µL followed by 75 µL Isoflow to bring the total volume to 100 µL for subsequent sample processing.
-
After Specimen requirements have been entered, select the box for Tube 1.
-
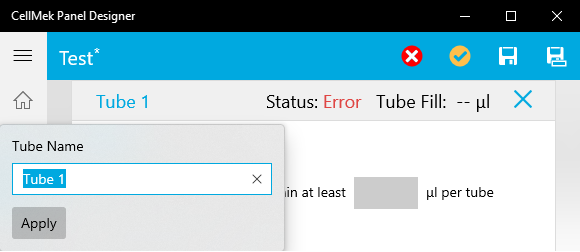
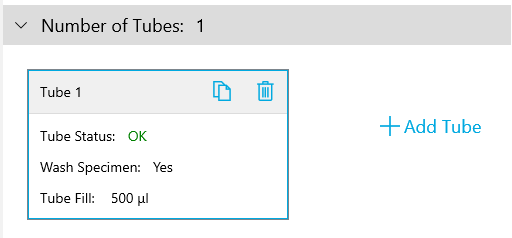
The screen will transition to fields for defining Tube name and individual tube steps. As the user enters information pertaining to their design, the tube Status and Fill Volume (µL) will update upon selecting the orange checkmark.
-
If Wash specimen for all tubes was selected in the previous Specimen section, then Wash specimen X times is automatically selected for the tube. Deselecting Wash specimen X times within the Tube definition screen will also deselect it from the prior Specimen section. This may be desired if the user wishes to perform specimen wash for only a subset of tubes within the panel they are generating. The number of wash cycles selected in the Specimen section will apply across all tubes using a specimen wash.
The Dilute final sample to obtain X µL per tube may be selected if the user wishes to align the sample volumes (up to 2300 µL) that will be presented to the flow cytometer in cases when individual tube volumes might otherwise be too low; the system fluid Isoflow would be used to dilute sample. For example if a user wants to present 500 µL to the cytometer, but the last step of defined preparation only yields 200 µL sample, 300 µL Isoflow would be added to the final sample if this box is checked.
-
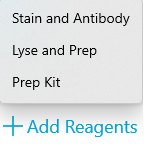
Select Add Reagents to open options for Stain and Antibody, Lyse and Prep, or Prep Kits.
-
Selecting Stain and Antibody will open a reagent block where the user can select up to 20 reagents, define individual volumes used (3 — 100 µL), set an incubation time, and define if the sample should be washed post incubation. The block header will remain red until all required fields have been populated.
Typing in the Reagent field will filter on the BEC Catalog products as well as any Custom Defined reagents the user has entered (e.g., LDR1 shown below). Recently selected reagents appear first in the list above the solid line.
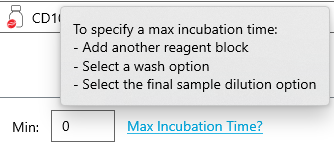
A Max Incubation Time is required if the user will be defining subsequent steps. Therefore, this field will only open once a subsequent step is selected. The Max Incubation Time must be at least 2 minutes more than the Min Incubation Time.
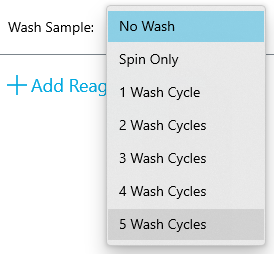
After incubation, the user may choose to wash the sample (up to 5 cycles) or perform a Spin Only to remove excess reagents.
If a Wash Cycle is selected, the user again has the option to define the final sample volume (450 -1500 µL) using the Wash Buffer (rather than the system Isoflow as mentioned above).
-
Similarly, selecting Lyse and Prep will open a reagent block where the user can select up to 20 reagents, define individual volumes used (3 — 2000 µL), set an incubation time, and define if the sample should be washed post incubation. The block header will remain red until all required fields have been populated.
-
Alternatively, selecting Prep Kit will open a reagent block where the user can select to use the IMMUNOPREP Reagent System, 300 Test (PN 7546999). Currently this is the only reagent kit supported where the CellMek SPS system would be performing based on system-set incubation times and reaction volumes. This is because the IMMUNOPREP Reagent System uses incubations on the order of seconds rather than minutes, as needed for other lytics that are supported. The user may still select to wash the sample after the reagent kit is used, if desired.
-
After populating the desired reagent blocks in the given tube preparation, select the orange checkmark to verify the status and desired Tube Fill Volume. Select the X to close the individual Tube screen and revert to the Panel screen.
-
If multiple tubes are desired in the panel, the user can select from the Panel screen Add Tube to create another tube from scratch. Alternatively, the copy icon may be selected to create an identical tube, which can then be edited after selecting the copied tube box. Up to 16 Tubes can be added in a single Panel.
-
After the Panel design has been completed (all tubes added), select the Save or Save As icon and then the appropriate file path to generate the .prep file. The file location will display under the panel name, as well as the latest Version number.
-
The .prep file(s) is transferred to the CellMek SPS system under the CellMek folder using a USB drive.
With the customized panels loaded to the CellMek SPS system, the user is now ready to simply load reagents, followed by specimen with their desired panels assigned to them, then let the instrument automate the rest in preparation for analysis.

